How We Installed Faux Wall Panels on Our Skoolie’s Front Windows
Today we’re doing a tutorial on a question we get asked a lot – how did you make faux wall panels over your front windows?
Insulating a bus is a must if you want to comfortably live in it. However, every window you leave is a spot heat can enter or leave. Especially those big front windows all skoolies have!
In order to combat the heat beating in and baking us in summer or losing all elements of it in the winter, we designed a set of faux wall panels that easily slide in and out. If we’re parked for an extended period of time, we simply leave them in and have “walls” in our front room. When we’re ready to hit the road, we slide them out and store them behind our bar while we drive.
And it’s so easy you won’t believe it – just two cost-effective materials!
Here’s how we did it.
SKOOLIE TUTORIAL: INSTALLING FAUX (REMOVABLE!) WALL PANELS
We knew we needed some kind of insulation over our front windows. Problem was, we actually need those windows while we drive, so it couldn’t be the same fiberglass insulation we used everywhere else. It had to go in and come out easily, be easy to store when we weren’t using it, and still be effective.
Reflectix turned out to be perfect. About a quarter of an inch thick and flexible, it’s enough of a barrier to insulate without being a hassle.
Step One
We cut two pieces of Reflectix. Each was large enough to cover one window and curve onto the skinny side window beside it. It’s easier to store two pieces than four, and doesn’t leave seams cold can seep in through.
Step Two
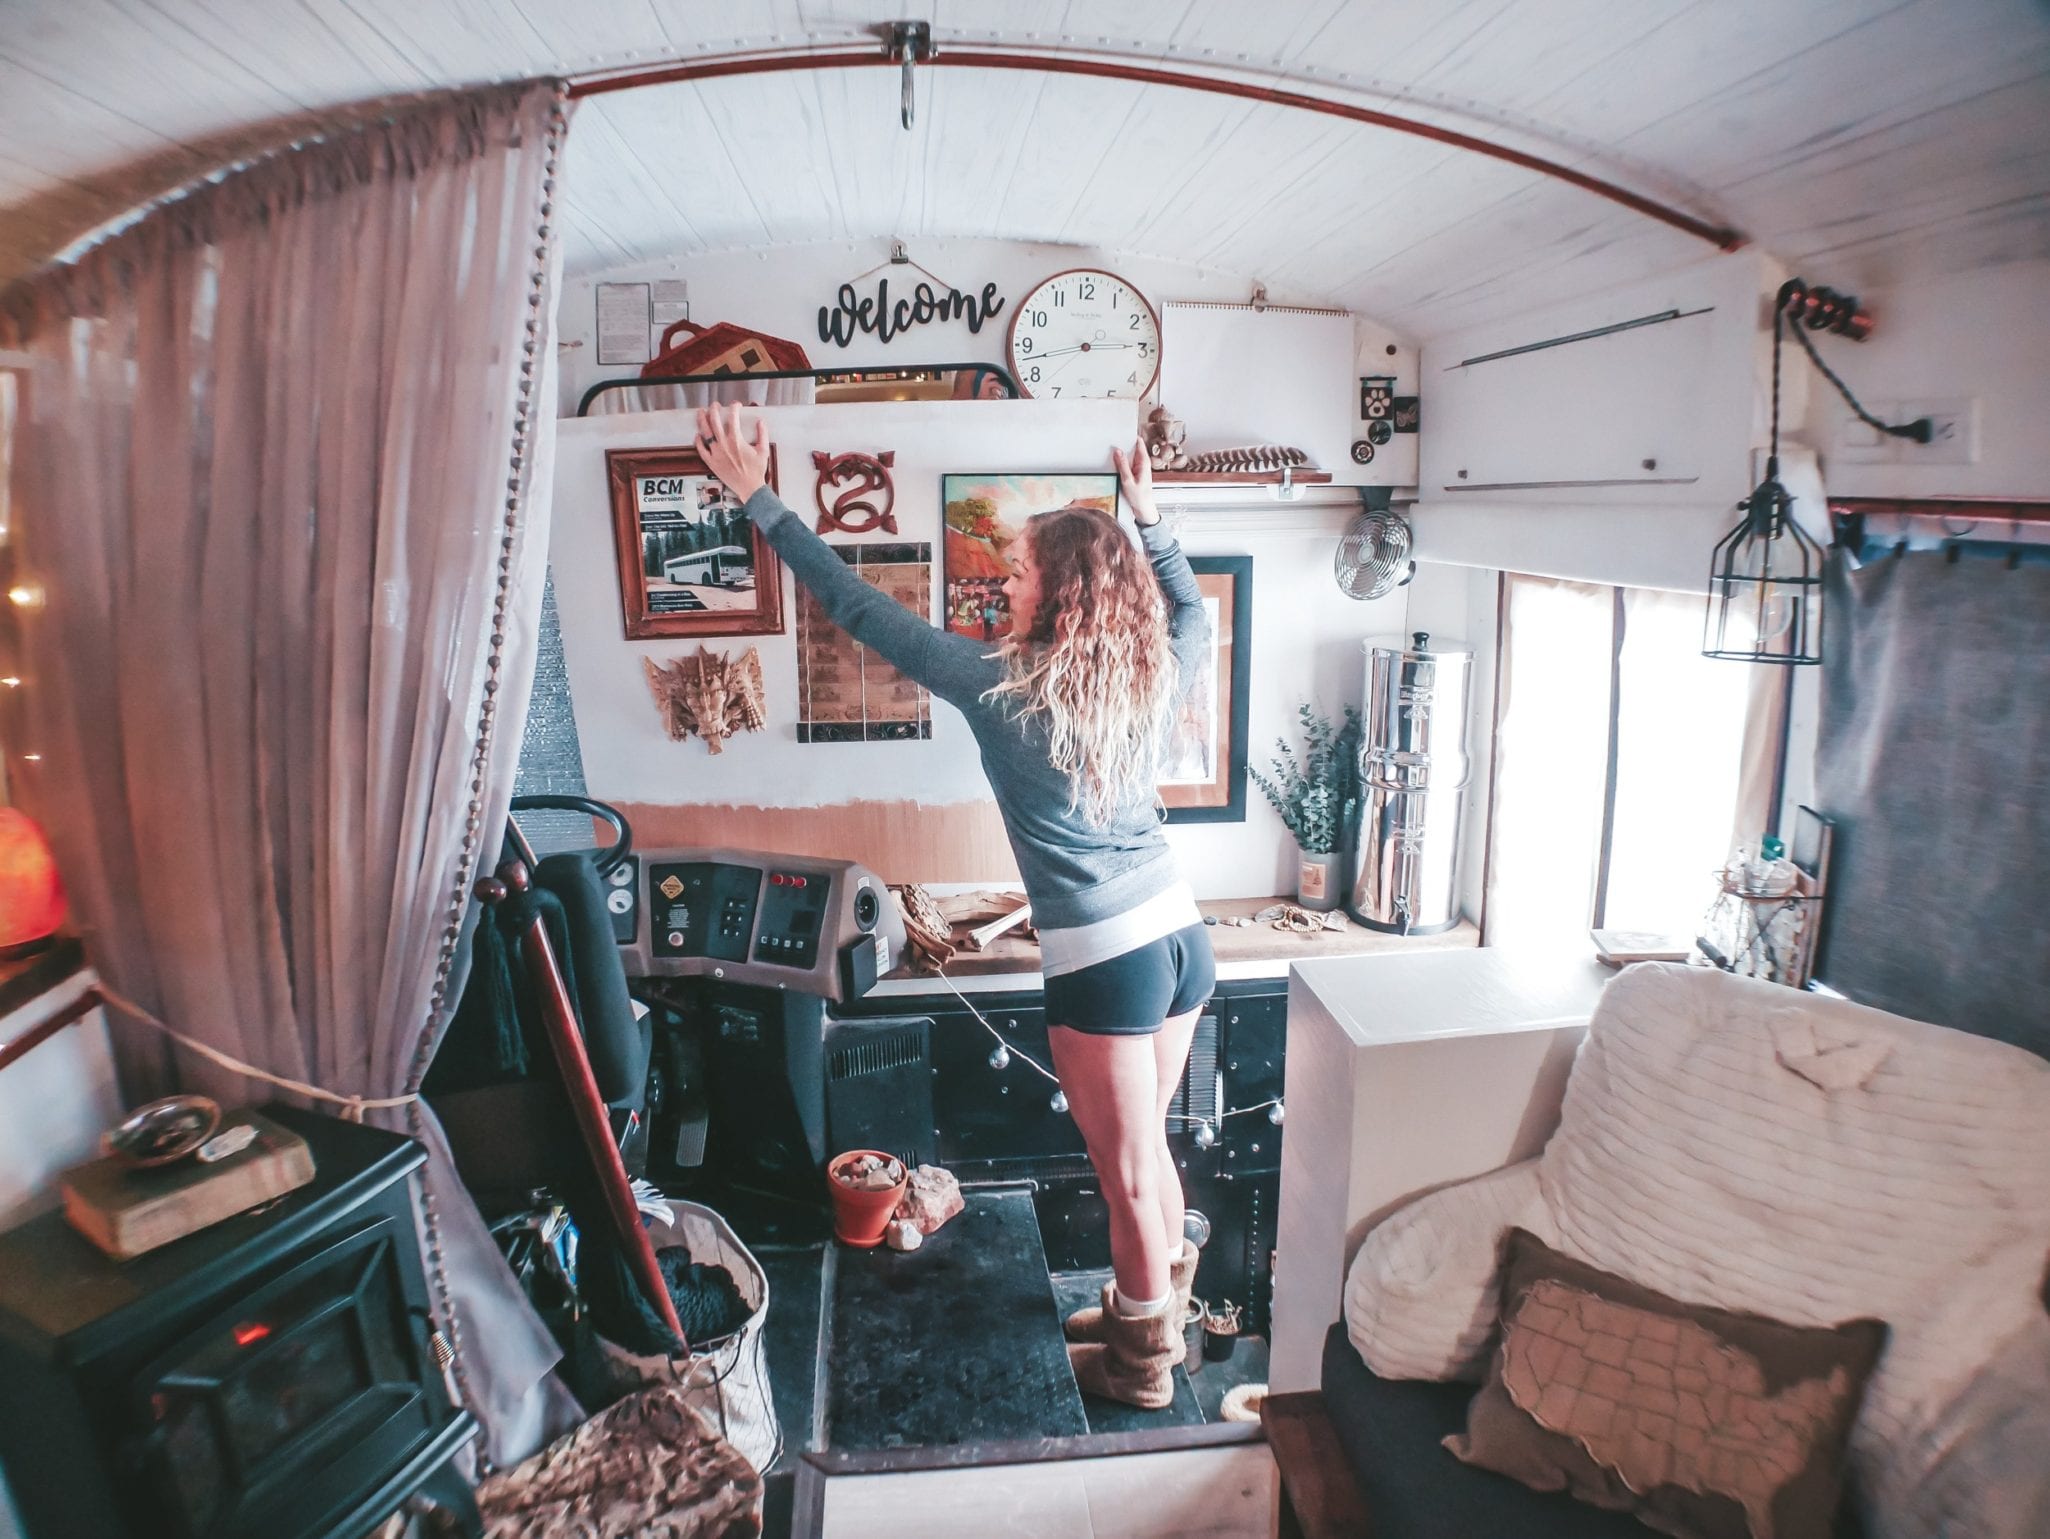
We then used thin wood wall paneling to cover it.
We measured each of the four windows and created an exact template for each, which we then transferred onto and cut into the wood. Do not assume both windows are the same size – ours weren’t!
After sanding the edges, we painted the panels the same white as our walls. You’ll see in the photo above I was so excited to get them in I only painted the part that would be seen above our shelves!
We left the Reflectix separate from the paneling, because sometimes while we’re traveling we like to put it up alone behind the shades we have up there.
The Reflectix slides in and is held in place on top by the window blinds, the center by the pieces of metal between the two windows, and the bottom by the dash/shelf we built in.
The panels slide over the top of them, held in place by the same.
FINISHING YOUR FAUX WALL PANELS
We used Command Hooks to hang artwork from our travels on the panels, which really finished the space out next to the hooks that hold our coats. We chose command hooks because they’re easy to remove and replace without worrying about holes, and if we do choose to take the art down, it’s much easier to put it back up.
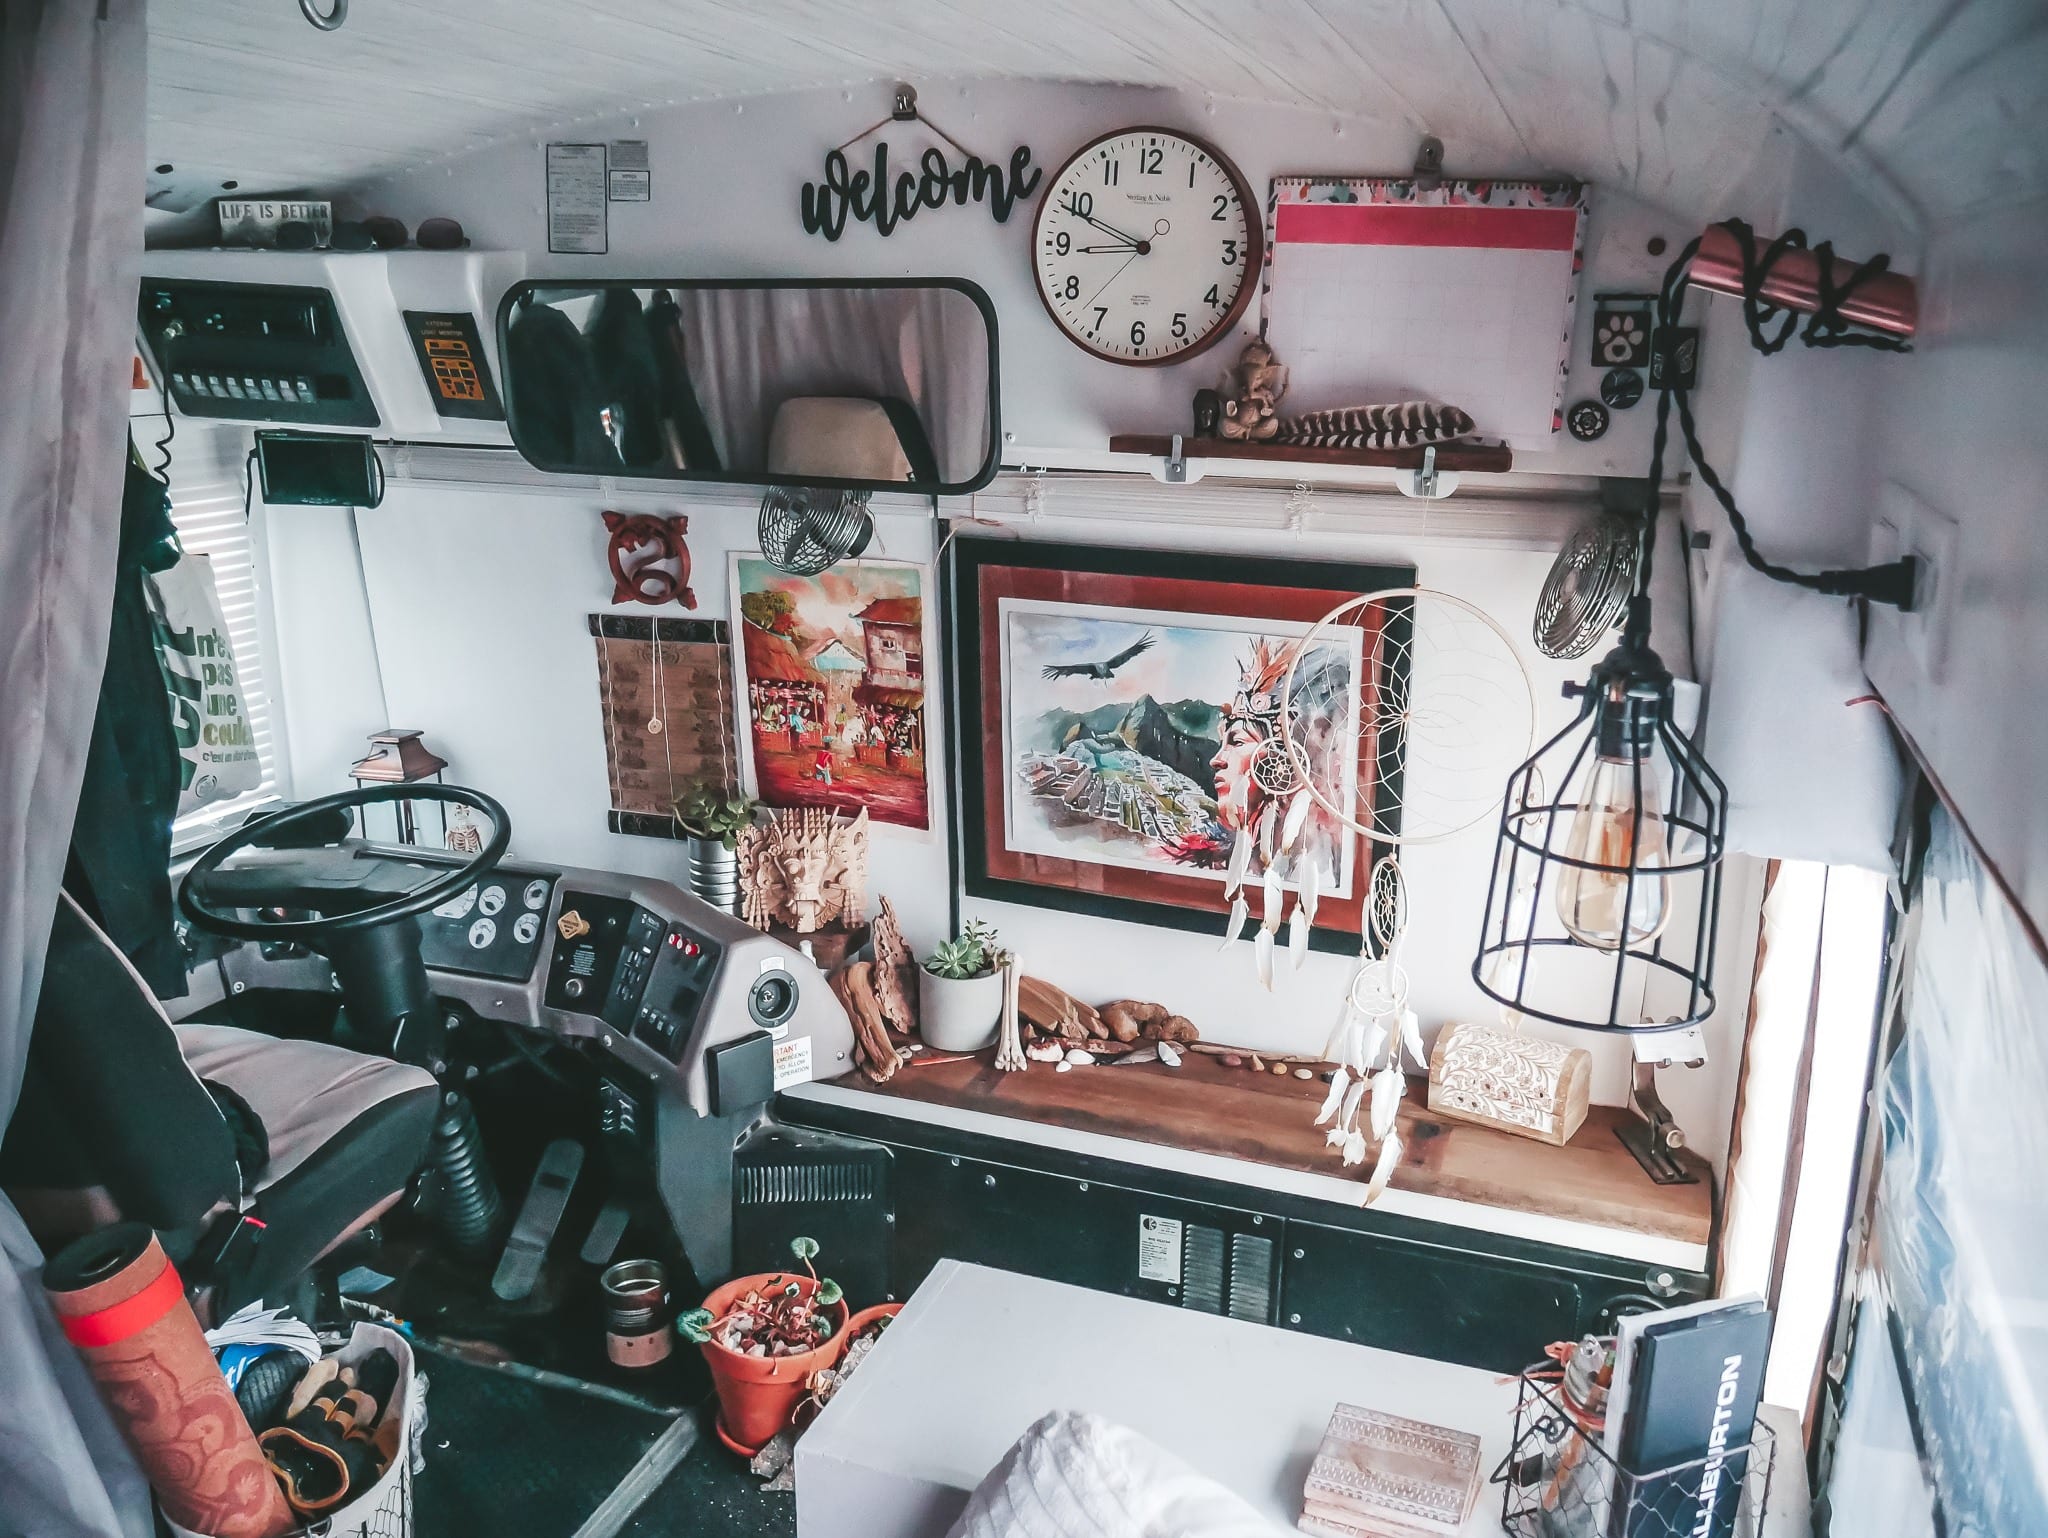
However, we normally don’t even have to take the artwork off when we slide the panels out – it all stays in place, like wrapping a decorated tree in plastic wrap.
Reflectix is pretty bomb, and we aren’t paid to say that! We bought a large roll that allowed us to cut pieces for all the windows, including the back window, which is super helpful during the summer months at blocking out that hot afternoon sun.
Questions about our faux window panels? Just shoot us an email! We also have a video up on our IGTV account showing how easy they are to put up.


