Skoolie Floor Plan and Bus Tour: One Year Later

One of the most fun parts of the school bus conversion process is choosing your skoolie floor plan. Even with the most careful planning and foresight, however, you might find after living in your school bus conversion for a while that changes are in order.
We most certainly had ours, and the bus has gone through several renovations since our initial skoolie floor plan was drawn.
(You can see our original skoolie layout post here!)

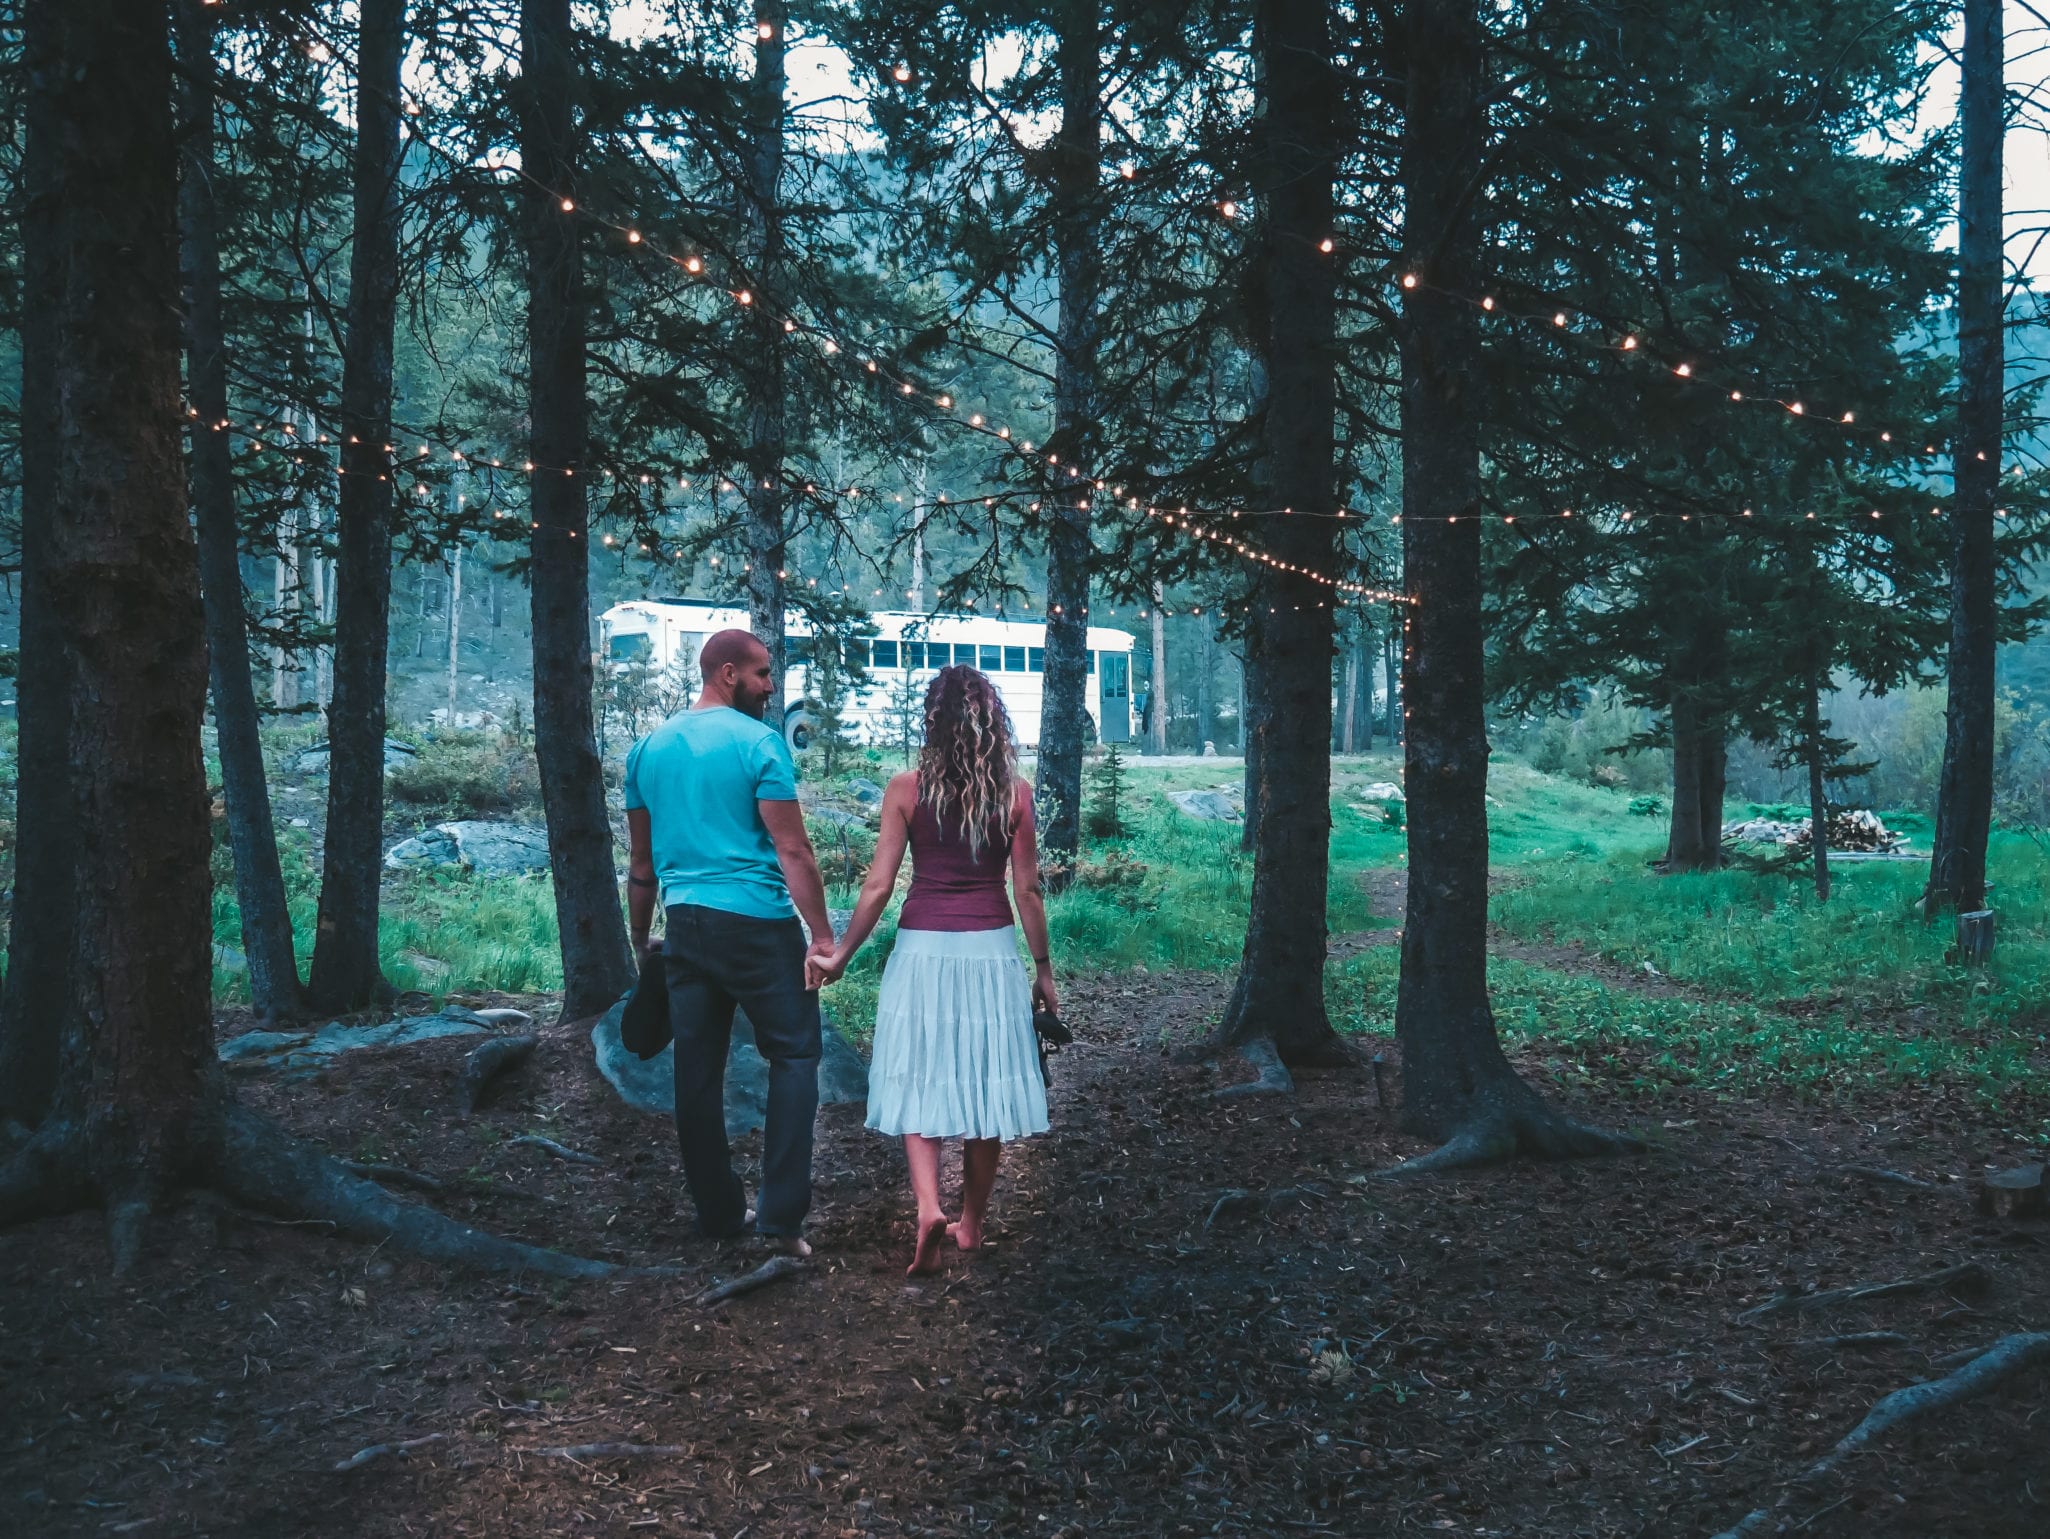
As a matter of fact, after a year of living in the bus, there are parts that look completely different from our original skoolie build. We decided an updated skoolie floor plan and bus tour were in order, so we headed back to Rock Creek, Montana – the first place we ever took our skoolie and where we happened to shoot our first-ever tour of the bus!
Keep reading to see the renovations we’ve made in the year we’ve lived here, a detailed drawing of our skoolie floor plan, and the video!
If you want to jump straight to the video, you can see it here!
THE RENOVATIONS WE’VE MADE TO OUR SKOOLIE FLOOR PLAN
If you’ve followed along with us for a while, you’ve likely seen the big changes on social media. And because I (Tawny) have commitment issues, there have been quite a few! Here’s a list, for those who haven’t been around as long.
REMOVING THE BUNK BEDS
Our first renovation came just a few months after we finished building, after our first big trip. Originally, the front of the bus housed the kids’ bunk beds. We’d chosen bunks because we wanted the kids to each have their own dedicated space on the bus. In theory, it was a perfect layout, but in practice the kids despised it.
They didn’t have enough headroom to fully sit up, and they hated being confined to their bunks while we drove. They said having “rooms” didn’t matter so much to them. Having space to hang out as a family, comfortable seating on the road, and a bigger “living room” and television were more their priorities.
So we ripped out the bunks and reused the wood and mattresses to create a built-in TV hutch, with a faux mantle that folded down into a murphy bed. We also used the opportunity to rip out our boxy storage couch that had matched the bunks and put in a smaller, platform-style couch with a matching mattress that mirrored the fold-down bed. Wire baskets underneath gave us just as much storage without the bulk.
Now they each have their own bunk for sleeping, but more room for hanging out during the waking hours. We were able to get a 40″ television on a swivel, and we added a hammock chair for additional seating.

REMODELING THE BATHROOM
A few months later, we decided we really wanted a bathtub. We decided to remove our washer/dryer unit, a decision a lot of people questioned our sanity on.
But the thing is, we really didn’t use it that often. In order to run it, we needed to be plugged in – which we rarely are. It became easier while traveling to hit up the big washers at laundry mats and get it all done in one go versus trying to hook up and spend hours doing multiple loads.
And while we’re near friends and family, it gives us an excuse to stop and chat while we do laundry.
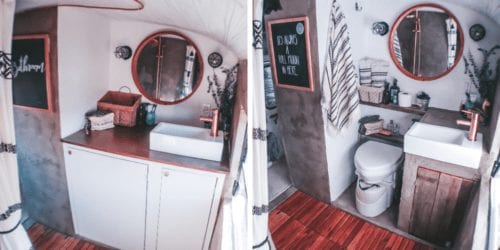
So the washer/dryer unit got pulled out of its large vanity cupboard, and then we removed the vanity altogether. In its place we built a smaller vanity cupboard half the size, meaning the toilet was able to move over to where the washer had lived. In the space left empty where the toilet once hung out, we built a concrete tub that matched the rest of our wetroom-styled bathroom!
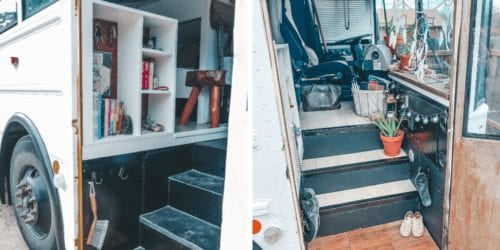
FINISHING THE ENTRY
Winter hit and we realized our front area was letting out a TON of heat. We’d left the entry as one of those “someday” things and around the time the temps hit freezing we decided someday had arrived.
We insulated the stairs and then added flooring all the way to the front and down the stairs. At the bottom step, we installed some of the remaining Acacia wood tiles we had left from our bathroom to help wet and muddy shoes dry out.
Then we designed insulated faux wall panels to go over our large front windows. When we’re parked for any length of time, we install them and hang artwork up, and it really helps the bus feel like home. When we travel these get stored in our basement and we enjoy the big panoramic views around us, utilizing the blinds for privacy instead.
REMODELING THE BATHROOM AGAIN
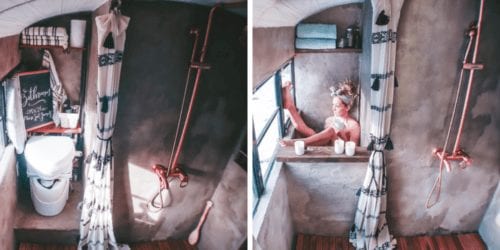
As spring hit, we realized we didn’t really like the awesome concrete tub we’d worked so hard on. It took almost half of our water supply to fill it, which didn’t make it practical at all.
I also really wanted the added bonus of being able to take a bath outdoors when we were out in the wild alone. After a ton of research, we realized an old wine barrel would be perfect – they’re already watertight and ready to go, we could keep it portable and let it drain into our existing shower drain, and it matched the bus’s decor perfectly.
We ordered this half-barrel from Amazon and drilled a hole near the bottom for drainage. Where the old tub had been we put in a hinged wall so that the tub can be taken off the bus if I want to, say, take a bath outside under a huge full moon!
ADDING TO OUR BEDROOM
On the other side of that hinged wall, on the wheel well where the original tub had been, we decided to absorb the space into our bedroom. Since the kids spend the majority of their time on the bus in their lounge area up front, Mike and I often work in our bedroom. Adding a window to that side of the bus allows a good deal of extra light in and opens our bedroom up to beautiful proportions.
This means we are able to work out of bed whenever we feel like it without feeling shut in. It also meant we had room for additional storage, which we found in the addition of this gorgeous storage chest/table.
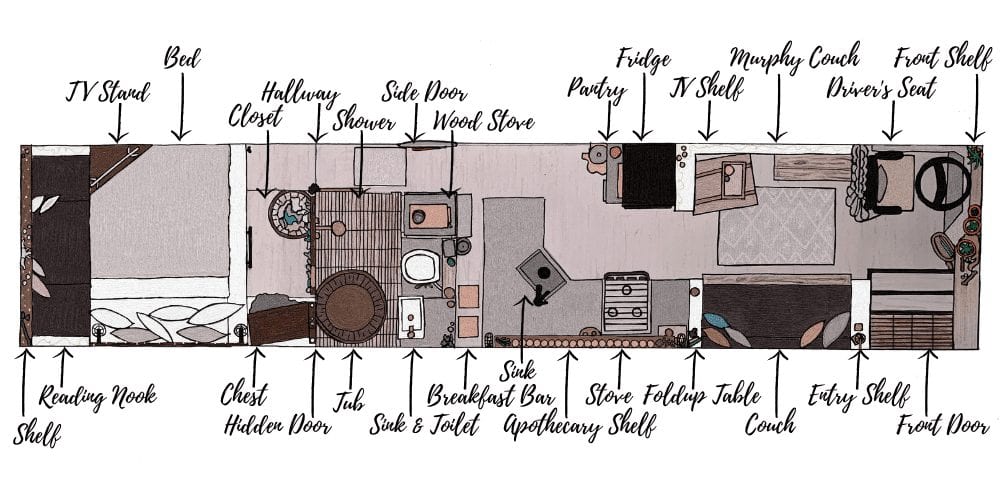
OUR SKOOLIE FLOOR PLAN
We receive pretty frequent messages asking about our skoolie floor plan and if we have a flat lay of it – and finally, we do have an updated version!
This was also, by the way, my first experience in digital art, which was super fun.
Without further ado, here is our skoolie floor plan and a breakdown area by area.
LIVING AREA
Starting at the front, there’s a shelving unit “mudroom” to hold keys and bags, and shoes. When we aren’t driving we have insulated panels that fit perfectly into the front windows, and there are coat hooks to complete the “room” effect. A sheer curtain divides this area from the rest while keeping it feeling open.
Right behind that, there’s a seven-foot-long couch that has a ton of storage underneath. We use wire storage bins that fit perfectly underneath to store electronics, paperwork, bedding, and craft supplies. At the far end of the couch is an open cupboard that fits a fold-up table the perfect size to fit between the two couches for game night.
Straight across is an entertainment center that has a fold-down murphy couch. When it’s folded up, it’s hidden as a mantle. Our 40″ TV is on a swiveling, pullout stand above it that allows us to move it around so the whole room can see it. An L-shaped shelving unit finishes out the entertainment center.
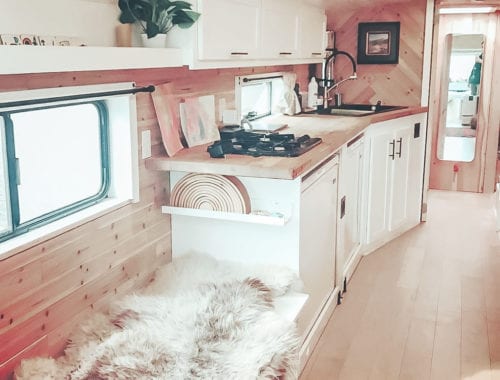
KITCHEN
The refrigerator is an almost full-size standalone unit that can use either electricity from our solar system or propane, and across the way is an L-shaped bank of kitchen cabinets. There’s a cupboard for the garbage and cleaning supplies, three large drawers that hold all the dishes, an open-style cabinet that holds pots and pans under the stove, and two large pantry cupboards for food.
The kitchen features a three-burner gas range and a built-in sink with a truly amazing kitchen faucet that we LOVE, feather finish concrete countertops, and a breakfast bar with seating for four with stackable stools.
Beside the fridge is an open shelving unit we created from an old map that hung in our old house. We used elastic on the front to hold our copper-lidded dry-good glass jars in – they’re easy to get out but don’t move as we drive.
A floating shelf runs the length of the kitchen and holds DIY herb storage jars, and magnetic spice jars are lined up above the fridge for quick access.
HALLWAY
Right behind this is a pretty cool corkboard wall with a cork map overlay, and built into this is the wood stove nook.
We scored a vintage-style Jotul stove for $40 that someone had around back in a junk pile, and my dad built a concrete/metal surround for it in order to show off the awesome rust color we chose to leave on it.
The side door is still usable, and we use it during the winter to bring wood in. Moving down you’re in a short hallway that leads to the master suite and the bathroom, which closes with a sliding barn-style door.
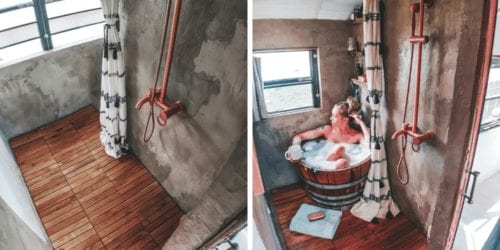
BATHROOM
The bathroom is built wetroom style, with a large copper showerhead on the wall as you come in.
Our Nature’s Head composting toilet sits to the left beside a small built-in vanity with a small basin sink with a matching copper faucet. The vanity acts as our “utility closet” that houses our water pump and on-demand hot water heater.
Across from the vanity is our wine barrel bathtub, which sits on the Acacia wood-tiled floors.
We did the whole thing in the same feather finish concrete we used on the kitchen counters and wood stove surround.
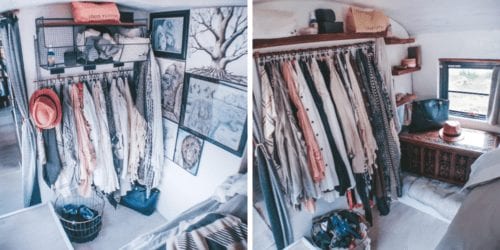
BEDROOM
Around the corner, over a small step that covers the last wheel well, you enter the master suite.
Our bed is done platform style with a ton of storage underneath that we use mostly to store camping gear and other items we don’t need daily. We created the top in four sections that each lift independently to make it easier to get underneath, and in the center are three HUGE drawers that pull out from the front (about 3×3 each) and house our clothes and shoes.
On the wall opposite the bed is a shelf and bar for hanging clothes. Another series of small shelves cover the back of the hinged wall that opens for the bathtub beside the closet, and on that wheel well sits a carved chest that we use for storage.
A lot of people choose to wall off the rear engine compartment of their bus, but I couldn’t handle the thought of covering that gorgeous huge window up – so we painted and upholstered a special mattress and turned it into a reading nook beside the bed.
As a matter of fact, we chose to leave as many of the windows uncovered as possible for the natural light. The ones we did cover (behind the bunk beds and fridge, in the bathroom, and behind our headboard) we simply insulated over.
In order not to have anything show through on these windows (as attractive as fluffy pink fiberglass insulation is) we first used a special kind of dark window film that acts as a thermal barrier and one-way tint. It makes all the windows appear black from the outside, and also helps gives us a little privacy.
SKOOLIE FLOOR PLAN AND BUS TOUR, ONE YEAR LATER
While we’ve tried to include as much as we could in other tours, we always seem to miss something. We’ve also made so many changes that none of them are completely accurate anymore – every bus tour we’ve done is outdated in some way now!
So while celebrating our one-year busiversary, in the same spot we shot our first-ever bus tour, we took time to shoot a follow-up that went into more detail than we’ve ever gone into (we tell you about our junk drawer people) and all the updates.
See it on our (new!) YouTube channel here!
We hope that we managed to hit everything between the video and this post, but if you have questions about our skoolie floor plan – just ask! Email us at info@sincewewokeup.com and we’ll do our best to help.
You May Also Like
Appa the Bus: Skoolie Feature Friday
Making Money While Traveling Full-Time